
If you're a meat and potatoes kind of person, then this one's got your name written all over it. Today, I'm hand cutting my own filet Mignon, and pairing it with some scratch made scalloped potatoes.

First and foremost, they're versatile. This one tenderloin could certainly provide anywhere from eight to twelve filet Mignon steaks in and of itself. But, in addition to that, it can be sliced into section and used for other dishes. Simply section it out, and store the rest for later in the fridge or freezer, depending on how quickly you intend on using it. That's exactly what I'm doing here today.
So now that we know we can get multiple meals out of one slab of meat, or feed a large group, the price is a little more justifiable. All the more so when you consider that your local grocery store is going to charge you on average $13.00 per pound for one filet steak, and you can see even more value in a bulk buy.
Alright, so hopefully I've convinced you that it's worth your money to buy the whole slab, and not just a piece.
As for what I'm using it for, I'm first cutting it into three pieces.

This section below will become my steaks.

The next will get packed away for my girl to take home, which she'll either filet or make a roast out of.

This final section I'll pack up and put in the fridge to make some beef stroganoff later this week. Of course I'll post the recipe when doing so.

But again, this is versatile. Any recipe you can think of that needs beef can be done with this. Fajitas, steak sandwiches, grind it up and make burgers or spaghetti sauce. Whatever you want.
Sorry, I'm really trying to sell this to you. Let me move on to my steaks.
I'm cutting this piece in half, and then butterflying it down each center.

As you can see, when folding them open, they make really nicely rounded two inch steaks.

I'm starting this in the morning because I want these two pieces of steak to sit in the fridge to dry brine. To achieve this, liberally coat each side of the steaks with freshly cracked sea salt. Then place it in the fridge uncovered for at least six hours, but up to twenty-four for better results.
When you dry brine a steak, it results in juicier meat, and a dry surface, which helps with the crust on the outside when cooking. It's so worth doing this with any steak or roast you make at home, regardless of the cut.
As the afternoon passes, I'm starting my potatoes. Before you get going, you're going to need to ensure you have an 8 X 8 pan. Either glass or metal. Shape doesn't matter. It can be square or round. Give this a good spray with cooking spray.
These will take about a half hour of prep, and one hour of cooking time, so plan accordingly. You'll need the following.
Ingredients
4 Russet Potatoes
3 Tablespoons Butter
3 Tablespoons Flour
1 1/2 Cup Heavy Whipping Cream
1 1/2 Cup Shredded Cheddar Cheese
1 Teaspoon Salt
1/4 Teaspoon Pepper
1/8 Teaspoon Cayenne Pepper
Start by preheating your oven to 350 degrees, and slicing your potatoes. These need to be thin. See the example below.

Once you have these cut, you're going to layer half of them in the bottom of your greased pan. Keep the other half set aside to be used momentarily.

You'll want to take a moment to measure out all your other ingredients and set them aside. Once you start this next step, you're going to be rolling, and time is of the essence. Note, for the cheese, you want to measure out one cup and half a cup, but keep them separate from each other.
In a medium sized pan, melt your butter over medium heat.

Once it's melted, add your flour, and immediately begin whisking.
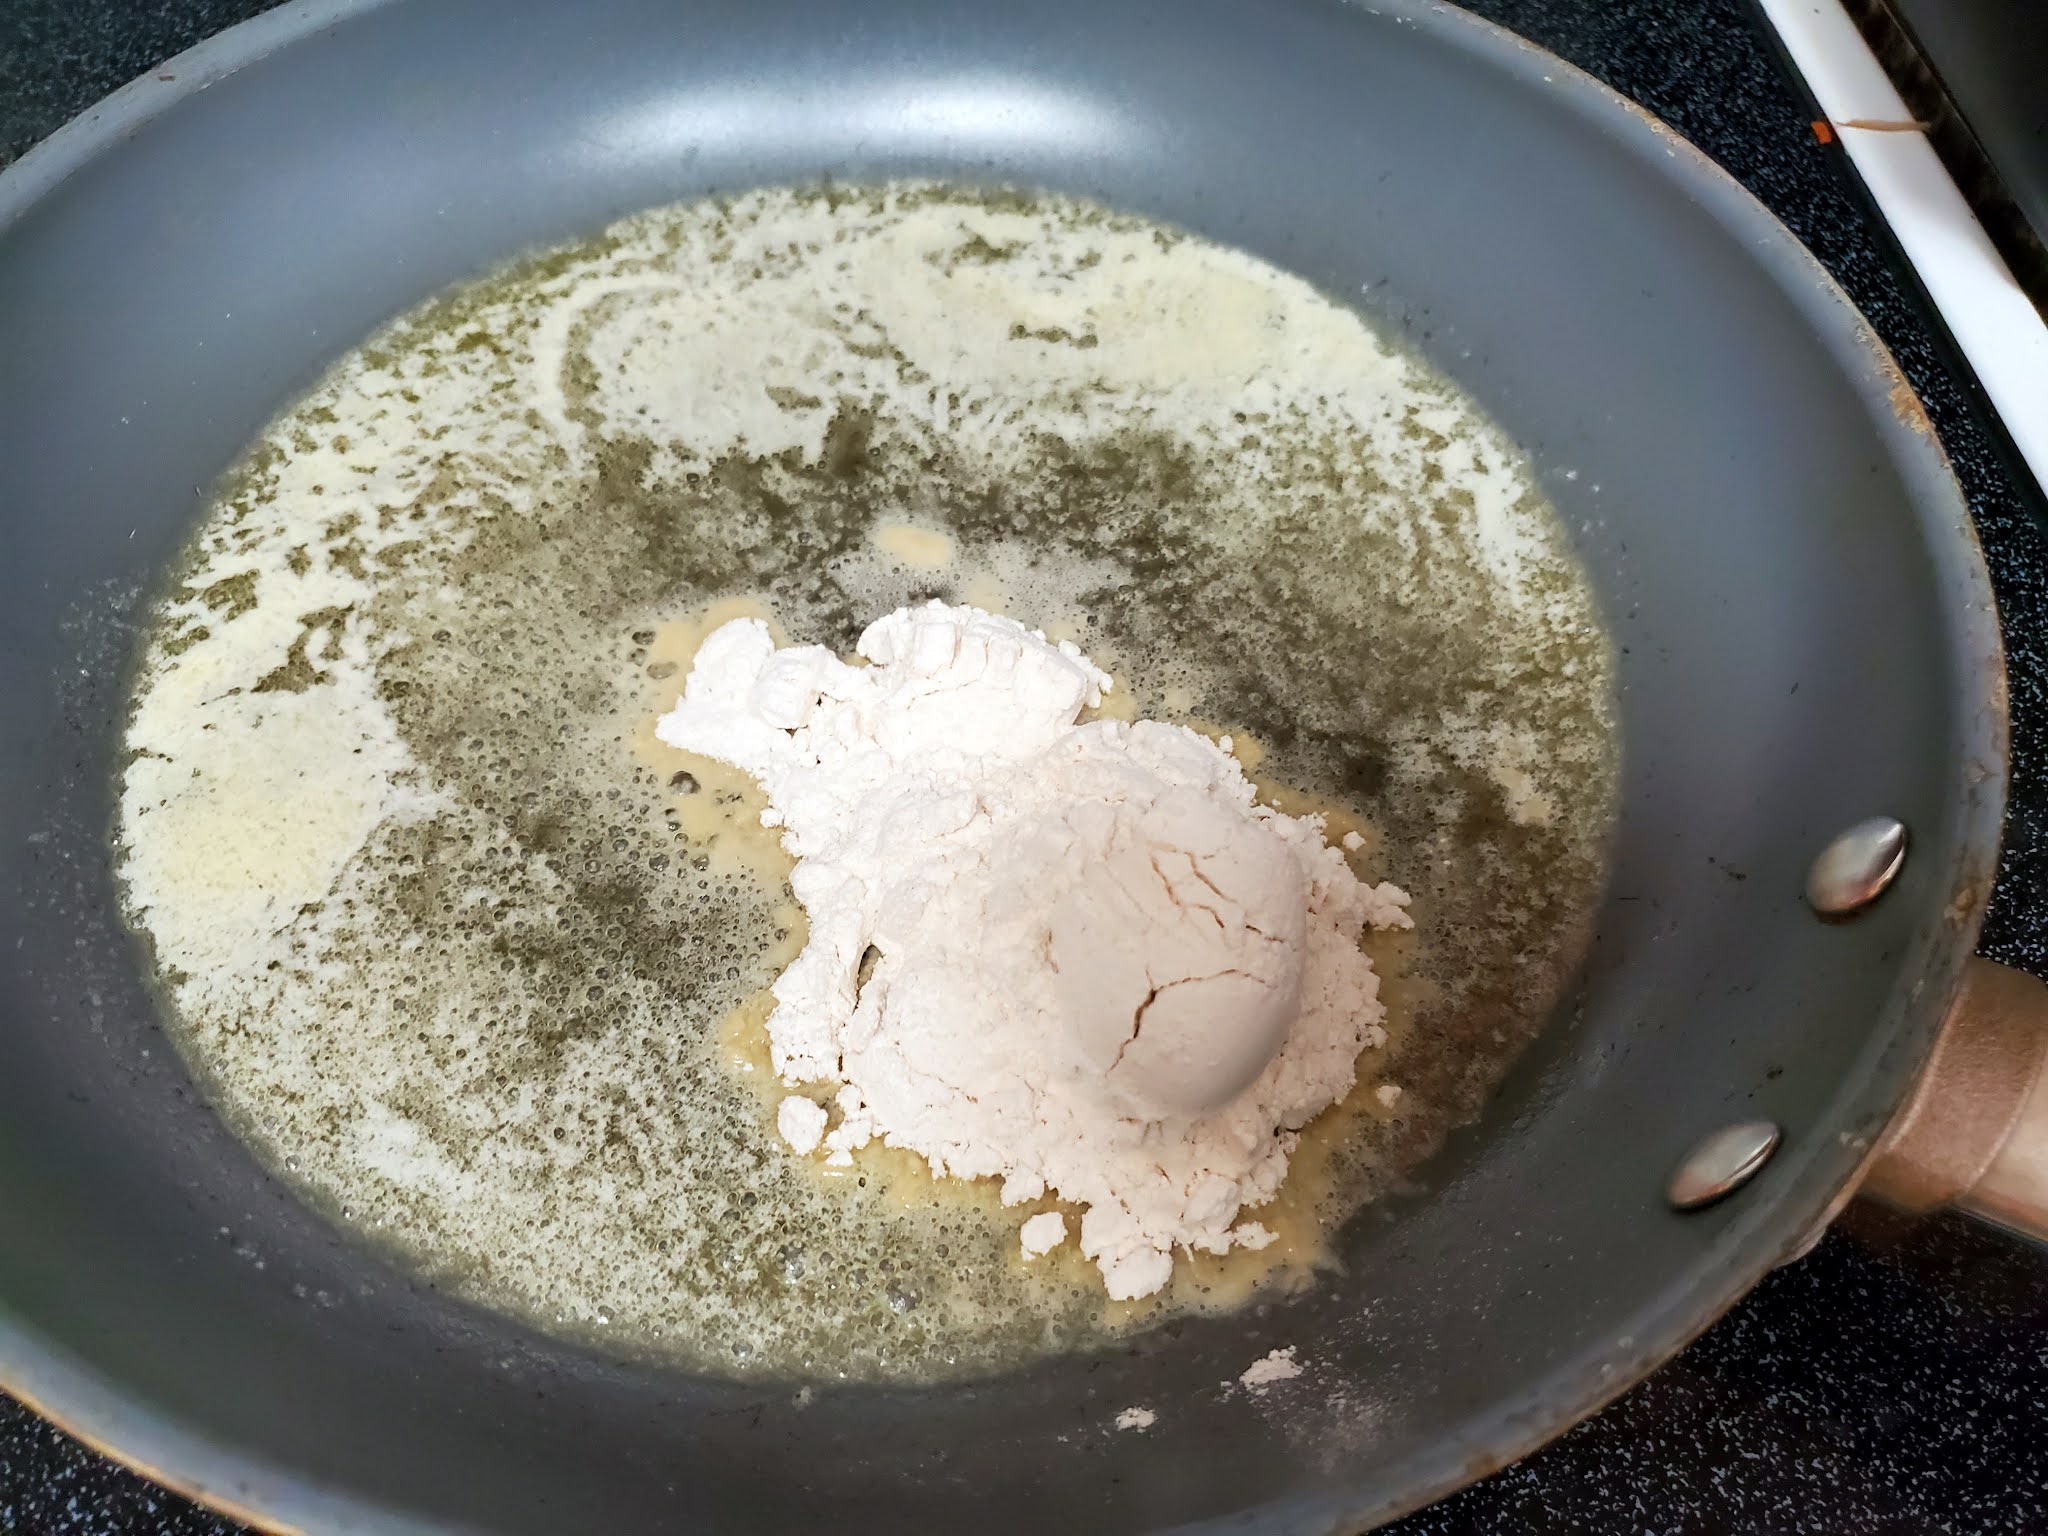
You want it to become smooth, and eventually start to turn a nutty brown color.

While continuing to whisk, add your heavy whipping cream.

Things may get a little lumpy at this point, but don't worry. Keep whisking, and it should turn smooth.
Now add your salt, pepper and cayenne, and continue whisking.

Pour in your one cup of cheese, and continue to whisk.

For this particular recipe, you're looking for a spreadable gooey layer. While this is not traditional for scalloped potatoes, with the sauce being a little thinner, this makes them so creamy and delicious. However, if you want a thinner sauce, remove it from the heat and whisk in an additional 1\2 cup of heavy whipping cream.

Regardless of how you proceed, you want to put half of your sauce over the potatoes in the pan. Since mine is a bit thicker, I use a rubber spatula to spread it evenly across the top.
Now layer your remaining potatoes on top of this, and pour the remaining sauce on top.

Sprinkle your remaining 1/2 cup of cheese (or more if you like) over top of this

Place this in the oven uncovered for one hour. It will look like magic when it's done.

Pro-tip - I gently tip mine over the sink, using my spatula to keep the potatoes in place to drain some of the oil that accompanies all the melted cheese and butter. That's just personal preference. Regardless of what you do, you want to let these sit for about ten minutes when done to firm up.
Pro-tip number 2 - Switch the potatoes out for cooked noodles, and make you some delicious macaroni and cheese.
It's during this time that I grilled up my steaks.


I also made some frozen yeast rolls to go with it.

After serving it all up, you know what goes down. Get to digging in.

Man, forget that boxed stuff. Look at those yummy layers of creamy potatoes. Get you a fork of meat and taters together for true bliss.

Just be careful. These suckers retain a lot of pockets of heat.
Click "HERE" to go back to the home page. For more posts related to this one, please click the labels below.
No comments:
Post a Comment